
Soft Top Shrimp Step by Step!

Weighted Wire: .020 NL
Step 1:
Slip your Spawn Football bead onto your hook before placing in the vise. Once in the vise add 15 wraps of .020 non lead wire on the hook shank. Add a very small dab of superglue gel if desired to the wraps that will fit inside the bead. When you slide the wire wraps into the bead cavity, make sure the slot is facing upward and the fullest part of the bead is on the bottom to fully utilize the bead's design.

Step 2: Begin your thread behind the wire wraps. Cover the wire wraps with thread in first diagonal wraps for two passes followed by parallel wraps for a pass or two. The diagonal wraps will help secure the wire from separating and the parallel wraps will bring them all together for a secure underbody. Take your thread to the hook bend and continue for 3-4 wraps.

Step 3: Add enough Pete's Peach Simi Seal to your thread to form a noodle roughly 3 inches long. Using figure 8 wraps make a very dense, strong ball with your dubbing noodle. This will act as our prop for separating the eyes and allow the other materials to flow properly for the shrimp effect we're after.

Step 4: Tie in a very small clump of Seal the Deal Spawn Simi Seal on the top of the shank. Using 3 wraps of thread, we will tie this clump to the shank in the center of the fibers. Carefully coax the fibers to sit either side of the hook point.

Step 5: Before we veil the Simi Seal, take your thread one or two wraps in front of the Simi Seal clump, toward the bead. Now the thread will not slip as you bring the remaining fibers toward the hook point while maintaining thread tension with your tying hand. Once the fibers are dispersed to both sides of the hook point a few more thread wraps will secure our first dubbing veil.

Step 6: Using another small clump of Seal the Deal, repeat the same process on the underside of the hook shank. Comb out after tying in to remove any loose fibers.

Step 7: Now we will tie in the mono eye on the near side of the hook shank. First tie the mono so the eye is roughly reaching the end of our dubbing veils. This puts the mono on the side of the hook nearest you. As you tie back toward the bead, take the mono to the other side of the shank, securing with tight thread wraps as you go. By tying in the mono this way it will be very difficult for the eyes to collapse toward each other. The other key is to take a wrap of thread in front of the eye and secure down behind the eye. Just another step to prevent those pieces of mono from meeting in the midline. I like to trim the mono even with the end of the weighted wire wraps for a smoother underbody.

Step 8: Side view after tying in first eye.

Step 9: Repeat that process for the eye on the other side of the shank. When finished you should have two eyes angling away from the hook shank and ready to attract the fish.

Step 10: Add 10-12 pieces of Flashabou Accent to the top of the hook shank. These should be trimmed unevenly at the ends and reach just past our Simi Seal veils at the longest.

Step 11: Add a small amount of bucktail on top of the hook shank. Theses fibers should not be evened with a packer. They should reach just past the flash and must remain on the top of the hook shank. If they begin to creep down the sides now they will be a mess after the next three steps. I like to tie the fibers back toward the bead, pull them to the underside of the shank and then trim for a subtle tail shape.

Step 12: Now tie in three legs to each side of the hook shank. These should be snugged up all the way to our last thread wraps used on the bucktail.

Step 13: Carefully make a thread loop for our dubbing loop in a couple steps. It's not easy to see in the photo, but the empty thread loop is tied just behind the legs, but because of the weighted spinner in the bottom of the loop appears to be on the other side. Take your working thread to behind the bead.

Step 14: Now we will build our underbody which will help our color effect in the water and also give our dubbing loop something to grab onto as when we get to that point. This is simply a matter of adding enough White/Silver Spawn Simi Seal to your thread to dub down to the legs and back to the bead. This will require adding dubbing to your thread a few times. Try to maintain an even dubbing noodle to produce an even underbody.

Step 15: After arranging your peach Simi fibers to be stacked in the loop, carefully slip them inside the thread loop, spin, gently brush out and spin a few more times. This is what you should be looking for more or less. The dubbing stack I prepared was roughly 4 inches in length and evenly sparse the whole way. We don't want to get overly full on our dubbing loop!

Step 16: Now we can wrap our dubbing loop body, but carefully take the first wrap on the other side of the rubber legs(toward the hook bend). After that first wrap go to the bead side of the legs and continue wrapping the dubbing loop in touching turns to behind the bead. All the while as you are wrapping your loop your off hand should be gently guiding the Simi fibers toward the hook bend. Tie off your thread loop and trim away the excess. With time you'll be able to gauge the amount of dubbing needed according to the hook you're using. No replacement for experience.

Step 17: Now get in there with a small brush or tooth brush or velcro on a wooden stick or whatever you want to brush out the fibers that may be trapped by thread and to remove any loose fibers no longer attached. After taking out your daily aggression on the brushing, it's only fitting to gently comb the fibers toward the hook point so we may calmly finish our sophisticated shrimp fly.

Step 18: Right on top of the hook shank and fly body we will tie in 10-12 ostrich herls. Nothing crazy here, just try to have some uneven ends and make a neat trim with the scissors after tying down. Make a tidy thread collar and add two whip finishes. Loon Hard Head or cement of your choice to cover the thread wraps. Now for the toughest 60 seconds involved in tying this fly... let the cement fully dry.

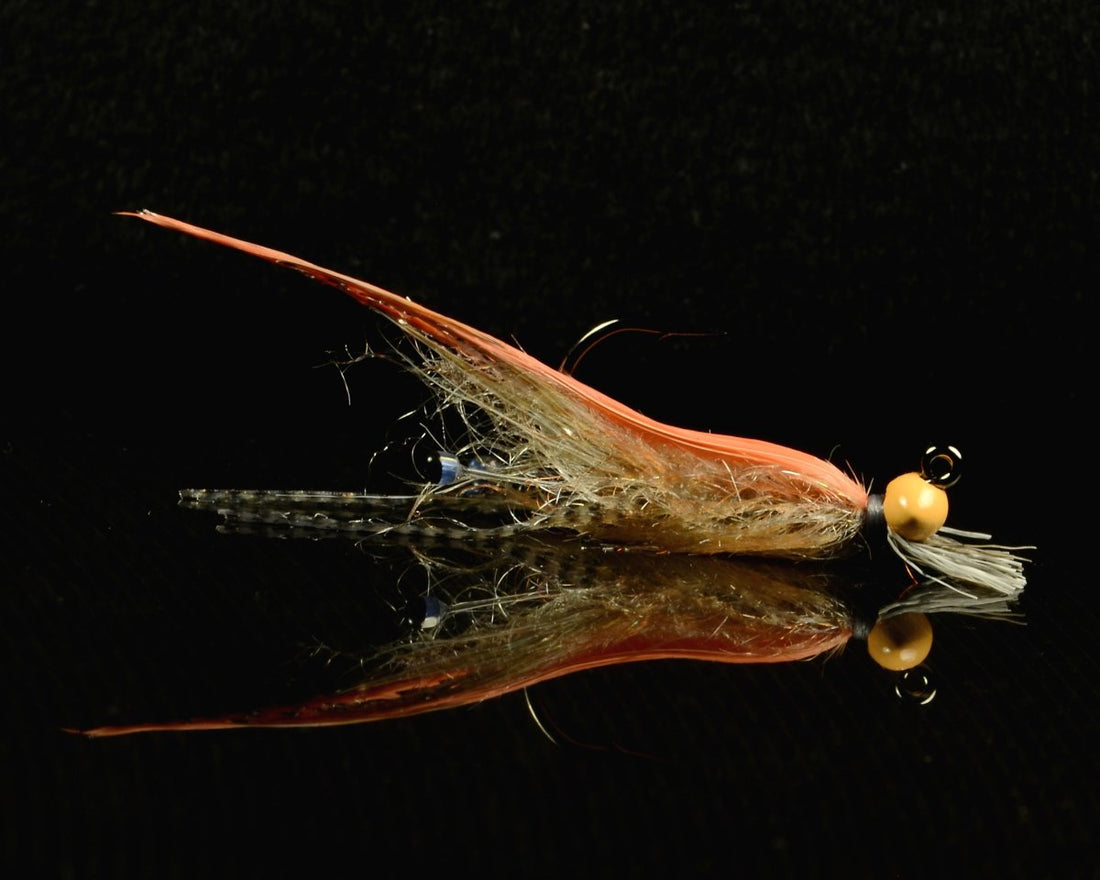
Step 19: In reward for your patience in letting your cement dry, you may now dip your shrimp into some nice clean water. You have tied a tasty morsel that will fool fish any time you are in the salt. Hope you learned a little and enjoyed a bunch. Thanks for tying along!
