
Christmas Midge-Last Minute Gift and Improve the way you tie!
Pete is at it again spreading the holiday cheer! Not only does this offer a great last minute gift idea but the details involved will help you improve every aspect of how you tie midges that will continually produce fish! Enjoy and happy holidays!
"Hand tied flies are a great way to spread some holiday cheer! Not only are they a meaningful gift, but they truly keep on giving. What begins as a simple fly and kind gesture may ultimately result in the first fish of a lifelong obsession or to a personal trophy that has nothing to do with the size of the catch. Make sure to tie a couple for yourself. The fish can’t refuse."
-Pete
Materials List:
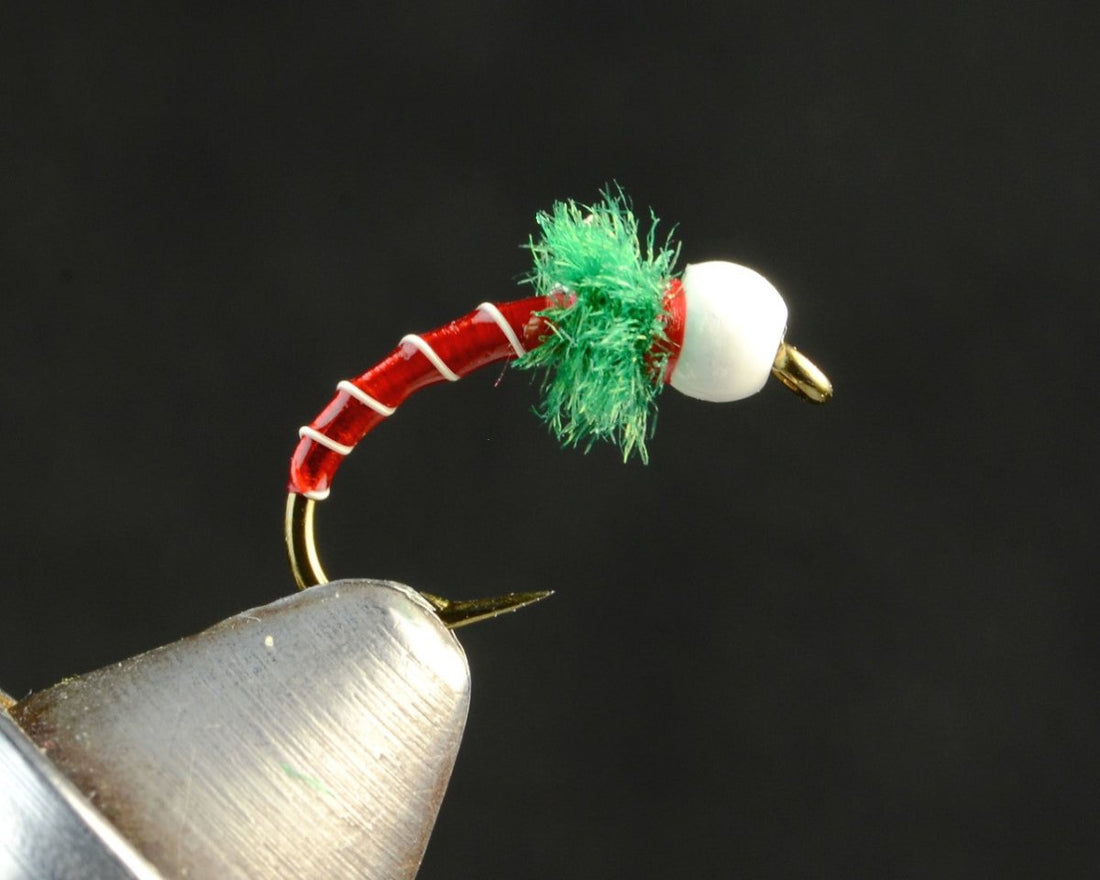
Hook: Daiichi #1120 size 10
Bead: Hareline Dazzle Brass Bead 1/8” Pearl White
Weighted Wire: NL .015
Thread: UTI Red 70 denier
Rib: Ultra Wire Small White
Collar: Nature’s Spirit Peacock Sticks Green
Head Cement of your choice
Loon UV Clear Fly Finish Thin

Step 1: Place your bead on the hook and then secure the hook in the vise.

Step 2: Wrap 10 turns of weighted .015 wire onto the hook shank. After cutting and flattening both ends slide the wraps of weighted wire into the back of the bead. These wire wraps not only hold the bead in position and add weight, but they also play a crucial role in the overall profile of our finished fly.

Step 3: Begin your thread on the hook behind the wire wraps. Cover the wire wraps with thread.

Step 4:
Tie in a piece of small, white wire. Brassie would also work. When you tie in the ribbing wire it should rest against the weighted wire wraps and should stay on top of the hook shank. The distance down the hook bend you wrap the body is a subjective preference. This is where I happen to end my midge bodies. Wrap the thread all the way back to behind the bead. We’ve now taken one pass down and back up the hook shank with our thread.

Step 5: This next step may be new for some, but it is a crucial skill to develop when tying smaller flies. Carefully spin your bobbin counter clockwise for a few seconds. This will flatten the thread and make for a much smoother body. After you’ve flattened your thread wrap down the hook shank roughly 7/8 of the previous wraps and then bring the thread back to behind the bead.

Step 6: We will once again spin our bobbin counter clockwise to flatten the thread. On this pass we will wrap halfway down the body and then back up behind the bead. You should now have a nicely tapered midge body.

Step 7: Wrap your ribbing wire in the opposite direction you wrapped your thread body. Tie off the wire with 4-5 thread wraps. Bend the wire back and trim the excess so the cut piece fits between the bead and last wrap. This will give you a better section of wire to tie down for a stronger fly.

Step 8: Completely wrap down the cut wire.

Step 9: Tie in 2-3 peacock herls. I like to tie them in by the tips, but about an inch from the ends of each herl. The tips are very brittle, so coming down some for the tie in will help with broken herls. Once the peacock is tied in wet your fingertips slightly and gently spin the herls together. This will add a touch of strength (a very small amount) as well as produce a fuller and more consistent collar as we wrap.

Step 10: Take as many wraps of peacock as needed to reach the bead. This example used 5 wraps. Tie off the peacock herls with 3-4 thread wraps.

Step 11: After trimming the excess peacock herls, wrap a clean thread collar and whip finish twice. Carefully apply some head cement to your thread collar.

Step 12: Carefully apply a thin layer of Loon UV Clear Fly Finish Thin to the thread body. Cure with your UV torch. This step can be done before the addition of the peacock herl. You can also use head cement in place of UV resin. The longevity of your fly will be greater if you cover those thread wraps with one or the other.
