

Pete's Super Scud - Fly Pattern
Pete is not only one of todays great tiers but is also one of the best teachers in the industry. His attention to detail, technique and encyclopedia of tying knowledge can answer any question that may arise. He's been on a scud kick lately and we are excited to share with you this awesome step by step!
"When you’ve put in the effort to hike to that alpine lake or you’re cruising your local pond there’s never a bad time to toss a heavy scud. Get it down where the big fish of still water lore can’t resist a chubby morsel served on a shiny, albeit pointy platter. Tie a dozen; tie strong knots and tie off some time for a great fish story."
-Pete
Beaded Scud Materials List:
Thread: Uni Thread 6/0 Gray
Hook: Daiichi 1120 size 10
Weighted Wire: Non Lead .020
Bead/Parasitic Hot Spot: Hareline 5/32” Gritty Tungsten Red
Antennae: Nature’s Spirit Mallard Flank Medium Dun
Rib/Wire: Ultra Wire Silver size Brassie
Back: Thin Skin Clear with Black Specks
Body Top/ Flash: Snake River Fly Dark Salmon Krinklezon
Body: UV Pink Steel Spawn Simi Seal
Head cement of choice
Resin: Loon UV Clear Fly Finish Thick

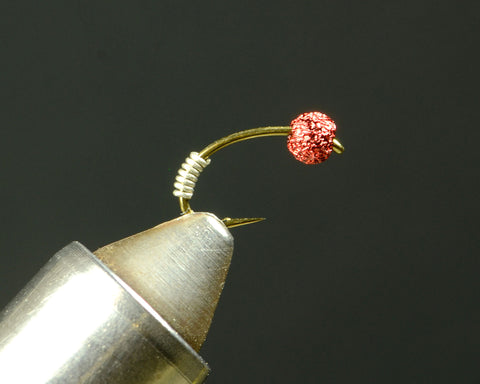
Step #1: Pinch the barb on your hook and slide on a sz 5/32” bead with the hook point going through the large opening first. It will make it easier to secure with weighted wire in the next steps. Place the hook in the vise.

Step 2: With the bead behind the eye, wrap 7 turns of .020 non lead wire at the hook curve. Clip off and smooth off the cut ends.
Step 3: With the bead now near the rear of the hook, add 8 wraps of .020 at the front of the hook. Again smooth off the cut ends with the inside of a curved scissors.

Step 4: Now pinch the wires together so that the bead rests roughly above the hook point. As one of the forward wraps of wire goes into the back of the bead you now have a balance of underbody wraps which is the base for a balanced finished fly.

Step 5: Wrap down the front section of wire wraps with thread. As you begin to add the second layer of thread add just a touch of glue or cement. Use your off hand to maintain the position of the rear wire wraps and the bead. Tie off with a whip finish and start the thread behind the rear wire section.

Step 6: As you over wrap the rear section of wire, decide where you want your antennae to splay. At that point add 4-5 thread wraps to build a bump. This bump will tell you how far down to wrap your next materials as well as help the mallard fibers to naturally spread.

Step 7: Tie in a clump of 10-12 mallard fibers the length of the body. This top view shows how your fibers should splay once tied down to the thread bump we made.

Step 8: Your thread wraps should come back toward the rear of the wire. Trim the mallard fibers and continue your thread to just behind the bead.

Step 9: Cut a 6” section of brassie sized silver wire. Tie it on underneath the body. You can see that where the wire sits in relation to the mallard fibers insures we wont disturb them when we wrap the wire. Secure this wire with 2 passes of thread wraps.

Step 10: Cut a strip of Thin Skin that is roughly the same width as the hook gap. Adding a tapered cut to your Thin Skin may be helpful when tying in. Another key is to wrap at a slight angle front to back with your thread as your off hand keeps the material directly on top of the hook shank. What you don’t want to have happen is your thread begins to dig into the Thin Skin. Keep your thread wraps going OVER the Thin Skin, not digging into it.

Step 11: Tie in the Thin Skin all the way to where your thread wraps ended for the mallard fibers. Don’t be scared to use two layers of thread to secure the Thin Skin so there is no chance for it to slide before being pulled over as the scud back.

Step 12: Tie in a clump of Krinklezon just smaller than a pencil thickness. Keep the Krinklezon on top of the hook shank. As we pull it forward in later steps, it will want to travel to the sides enough. For the sake of a clean, tight fly make sure the Krinklezon fibers are tied down all the way to where the Thin Skin was last tied down.

Step 13: Make a 4” dub noodle with the Simi Seal. You can adjust if you need to add more as you wrap. Start wrapping your dubbing directly behind the bead all the way back to the Krinklezon tie in. At that point continue dubbing a second layer back to the bead.

Step 14: Ideally as you wrap the last of the dubbin in the rear of the fly the thread will be bare as you cross it over the top of the bead at a 45* angle. This will be covered by our following materials. Advance your thread to the end of the wire wraps. As we repeat the dubbing process in the front of the fly, keep in mind the amount of space behind the hook eye. We still have some bulky elements to pull forward, so keep and eye or two lengths of empty space where no Simi Seal accumulates. It will save frustration later.

Step 15: After dubbing back to the bead and forward for 2 layers and a clean tie off area behind the hook eye. If you keep your thread at the base of the wire wraps instead of behind the hook eye it will help prevent your thread from slipping a wrap off the end.

Step 16: Pull over all the Krinklezon fibers in one snug group on top of the body. Use 4-5 firm thread wraps to securely tie down the flash. Add 7-8 thread wraps between the Krinklezon fibers and the hook eye. This builds a small thread dam which will keep the hook eye clean on the finished fly. Bring the thread back onto the original tie off wraps and back as far as you can where the wire wraps end.

Step 17: Pull over the Thin Skin. You should pull it snugly over the Krinklezon and tie off with 5 firm thread wraps. The reason we can pull the Thin Skin back with some tension is because of our careful thread wraps at the tie in. Make sure the Thin Skin stays directly over the top of the hook as you tie it down.

Step 18: Wrap the silver wire in even spaces, gently wiggling back and forth as you wrap to ensure proper seating. As you wrap the wire pay attention to keeping the leading edge of the Thin Skin under the wraps to avoid cutting, and keeping the Thin Skin on top of the hook as you tighten and progress the wire rib.

Step 19: After securing 2-3 wraps of the silver wire tie down and trim the excess. Trim the Thin Skin carefully so as to not disturb the Krinklezon and to leave a clean cut. At this point trim the Krinklezon to body length. Trim out half the fibers to match the sparseness of the mallard fibers.

Step 20: Use your bodkin to pick out the Simi Seal around the wire rib to fill out the entire underbody. Once they look buggy trim them to the length of the hook point.

Step 21: After checking the top of the Thin Skin to make sure there are no Simi fibers stuck anywhere, apply two even, thin layers of Loon thick UV Clear Fly Finish. Make sure to cure thoroughly between the first and second layer. Your scud is now ready to find some fish!