
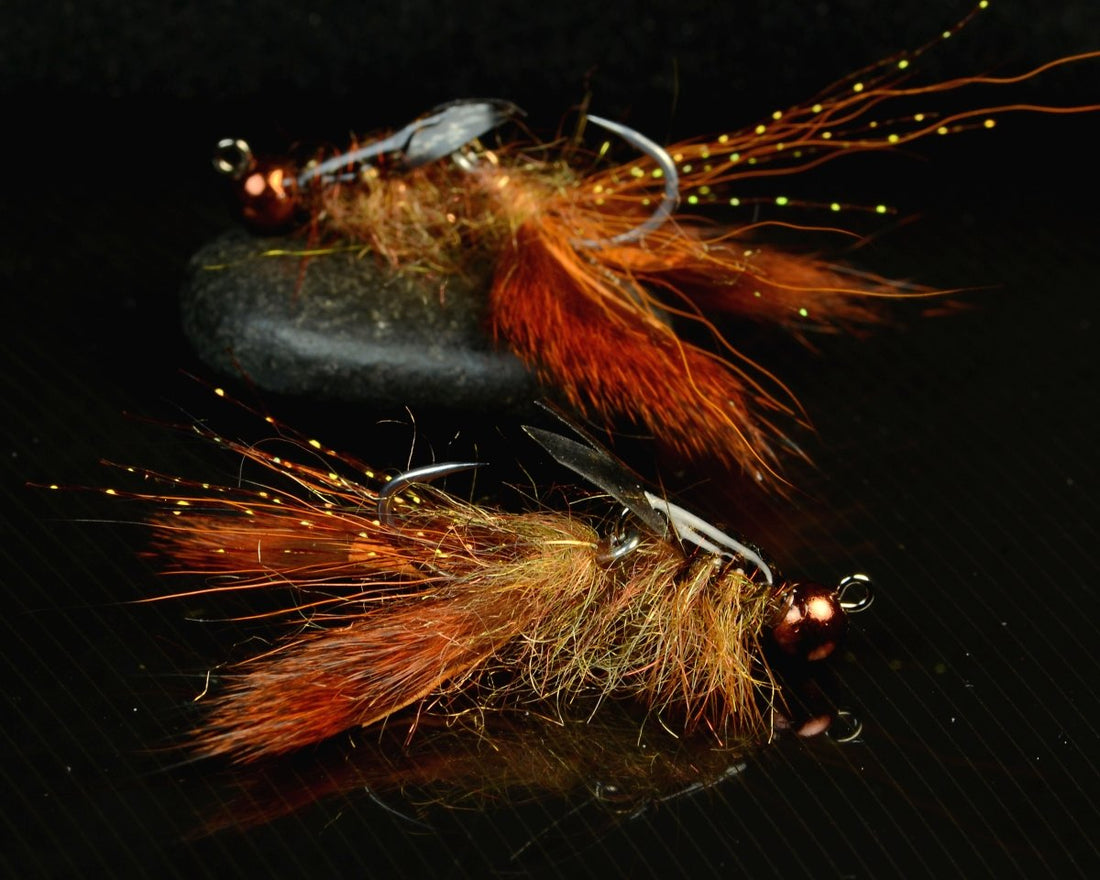
Spawn Micro Jig Shank Baby Cray SBS- Articulated Crayfish
Spring time means hungry fish and the first sightings of early, tiny crawdads. A small crayfish pattern with articulation and a heavy bottom should be plenty tempting for some waking giants. The Spawn Micro Jig Shank puts this fly in the perfect position to mimic natural crayfish movements. Very little line manipulations equal big movement for this tiny morsel.
-Pete
Materials List:
Hook: Ahrex SA274 sz 10
Thread: UniThread Camel 6/0
Shank: Spawn Micro Jig Shank 60*
Weighted Wire: NL .020
Bead: Nature's Spirit 5.5mm Tungsten Slotted Metallic Brown
Flash: Krystal Flash Copper Brown
Antennae: Nature's Spirit Select Bucktail Burnt Orange
Hot Spot: Spawn Coastal UV Simi Seal Pesca Hot Pink
Claws: Nature's Spirit Pine Squirrel Zonker Strips Crawdad Orange
Body: Simi Seal blend of 2 parts Crawdad to one part Reddish Brown
Shell: Thin Skin Mottled Bustard Natural
Legs: Whiting Farms Rooster Saddle Feather Brown
Rib Wire: Ultra Wire Brassie Copper Brown
Loon Hard Head
Loon Clear UV Fly FInish Resin Thin and Thick
ALL available at Spawn!

Step 1: Place the hook in the vise. Keep in mind while we tie that this hook will ride point up.

Step 2:
Begin your thread on the hook shank. Where the hook begins to bend we are going to make a small ball of Spawn Pesca Hot Pink Simi Seal to act as a way of keeping the claws separate while also offering a hot spot. The ball is made by dubbing a noodle roughly 3 inches long. Wrap your dubbing noodle back and forth in the width of 3-4 thread wraps.

Step 3: Add a thin layer of Loon Clear Fly Finish Thin to the dubbing ball. Cure the resin with your UV torch. Now we have a solid hot spot that keeps the claws from collapsing on themselves.

Step 4: We will now tie in our claws. The length of each claw is just shy of an inch, measured on the leather, not the fur. At the base of each claw, remove about a quarter inch worth of fur. This will give us a clean tie in. Tie in one strip on either side the hook. Once they are snugged up against the hot spot they will never foul on the hook point or each other.

Step 5:
Making sure your hook is point up, veil a few strands of Krystal Flashon what will be the top of the head. We will trim these to length after the fly is fully tied.

Step 7: Now we will add some bucktail fibers. These do not need to be stacked. They should extend just past the claws. Less is more.

Step 8: Load your thread with the Simi Seal blend and form a dubbing noodle. We will be making two full passes back and forth, so make sure your dubbing noodle stays tight and your thread wraps maintain as constant a pressure as possible. Once you've finished the second pass, add two whip finishes and cement your thread wraps.

Step 9: Before connecting the hook to the shank, slip on the bead. Once you've added the hook and placed the shank in the vise, add enough wraps of .020 wire to secure the position of the bead and to also meet where the shank arm is tied down. This will make for a smoother underbody for any shanked flies.

Step 10:
Fully wrap down the shank arm and wire wraps with a touch of cement and thread wraps.

Step 11:
At the rear of the shank we are going to make another dubbing ball, but this one we will not be covering with resin.

Step 12:
After brushing out the dubbing ball and coaxing the fibers rearward, you can see that not only does this help disguise the shank connection, but it will also help to keep the hook in the proper alignment.

Step 13: On the far side of the fly we will tie in our hackle feather. Tie it in so the darker side, or convex, is facing the hook shank. This will allow the better side to face the front of the fly as we wrap. The fish will appreciate the attention paid.

Step 14: Now tie in a 5-6" piece of the copper brown wire. This should be tied in right next to the feather, and both should be tied firmly up to the dubbing we tied in previously.

Step 15: This is roughly what your piece of Thin Skin should look like before we peel off the backing and tie in. This is just shy of one inch in length and just shy of 1/4" in width. The taper will help preventing the Think Skin from folding when tied in. You can always trim the Thin Skin after the fly is finished, but you can not add material back, so a little extra length is ok.

Step 16: Tie in the Thin Skin on the tapered end so the strip goes over the shank eye and bead. Be careful not to add too much tension or stretching so as to not weaken the Thin Skin.

Step 17: In the same way we dubbed the back of the head, we are going to make two full passes back and forth with a dubbing noodle. This does not have to be overly thick, but it does need to be wrapped firmly enough to hold the body profile we want.

Step 18: Now wrap the feather back in 3-4 evenly spaced wraps. Wiggling the feather ever so slightly as you palmer it will seat it into the dubbing and prevent the quill from slipping somewhat. Tie off the feather with 3 firm thread wraps.

Step 19: Trim all the hackle fibers from the top of the fly body.

Step 20: As you pull the Thin Skin over the body of the fly, take one wrap of thread so the thread will now be in front of the Thin Skin. Holding the Thin Skin in place with your off hand, take 3-4 wraps of the ribbing wire. Do your best to not crimp the Thin Skin on the sides as you wrap the wire. After trimming the excess wire and tying a neat thread collar, add two whip finishes and cement the thread wraps. Now is the time to pick out some of the Simi fibers and to also add a layer of Loon Thick Fly Finish to the top of the shell. Cure with your UV torch and trim the flash fibers to your desired length. You are now ready to torment some fish!
