
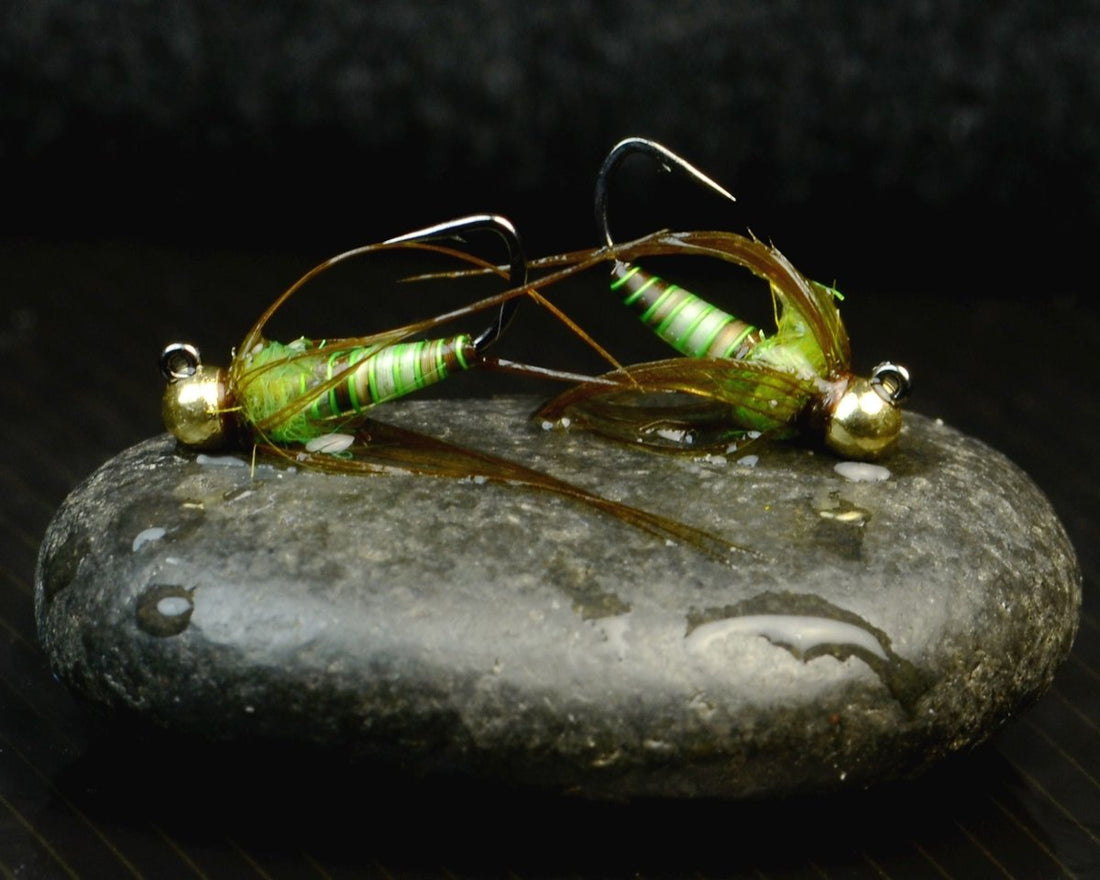
Caddis Pupa using a touch of Spawn Simi Seal!
Spawn's very own Pete Rosenau is at it again!
This version of a caddis pupa is a great example of using triggers in a simplistic manner that can still produce a semi realistic fly. There is the added bonus of being able to stop halfway through tying the pupa to have an extremely productive cased caddis larva. Why not tie them both and have a caddis selection to cover both needs? Thanks for tying along!

Materials List:
Hook: Daiichi 4647 sz 16
Bead: Hareline Slotted Tungsten 7/64” 2.8mm Gold
Thread: Ultra Thread 70 Brown
Weighted Wire: LF .015
Body/Abdomen: Peccary Hair- Split
Rib: Ultra Wire Fluorescent Chartreuse Small
Thorax/Hot Spot: Spawn Coastal UV Simi Seal Chartreuse Yellow
Collar: Nature’s Spirit Duck Cul de Cenard Brown Olive
Body Cover: Loon UV Clear Fly Finish Thin
Loon Hard Head or head cement of your choice
Step 1: Once you’ve picked out your peccary hair, notice the tassle, or split ends at the tip of the hair. Gently peel the hair using these split ends so you end up having two pieces of hair. This will allow for a much smoother body without unnecessary bulk.

Step 2: Once you’ve split the hair you can decided which side to use. If both pieces look ok you can simply tie two flies!

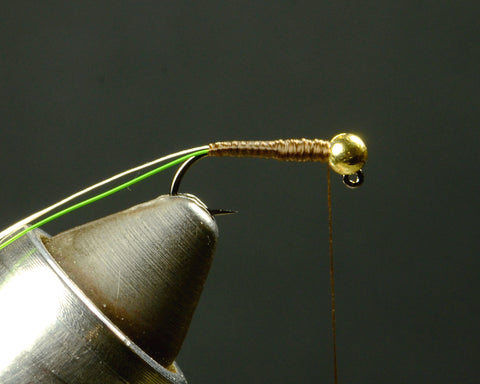
Step 3: Slip on your slotted bead and then put your hook into the vise. Add 8-9 wraps of .015 non lead wire. These won’t push into the back of the bead, but instead will be held against the back of the bead by the thread wraps.

Step 4: Begin your thread behind the wire wraps. Securely wrap over all the wire wraps and add a layer of thread back to where the hook begins to bend. This will act as your end point for tying in the next materials.

Step 5: Tie in a 4-5” piece of the ribbing wire. This should snug up to the wire wraps. Wrap down to our previous thread wraps and back to the weighted wire wraps.

Step 6: We will now tie in the half piece of peccary hair. The hair should be tied in with the good side of the hair against the hook shank. That way the good side will be exposed as we begin to wrap. The other key is that the peccary be on the away side of the ribbing wire according to where you are seated. As you can see from the photo, we will wrap the peccary hair first which will leave a natural path for the wire to follow in the gaps. If we wrapped the peccary to go over the wire on its first wrap we’d then have to cross the wire over the hair just to start. This would lead to a less than clean look to our finished fly, not to mention adding undue stress to the peccary.

Step 7: Before wrapping the peccary and wire, spin your thread bobbing counterclockwise to flatten the thread. At this point make a few passes up and down the hook shank to create a smooth thread underbody. This makes a big difference when tying quill bodies or flash bodies.
Step 8: Carefully wrap the peccary hair forward up the hook shank in touching wraps. Use a constant, gentle pressure while wrapping. Tie off the hair behind the bead with 5-6 strong thread wraps.

Step 9: Now wrap the ribbing wire in the gaps between the wraps of peccary. Take your time and watch each wrap to ensure proper placement. The same gentle, consistent pressure will ensure the wire is well seated without damaging the peccary.

Step 10: Once you’ve tied off and trimmed the wire and peccary, now is the time to add a thin layer of UV resin. This will add to the visual appeal of the fly as well as strengthen the peccary against toothy critters. At this point you could tie off with two whip finishes and have a very productive cased caddis larva.

Step 11: Trim the fibers from the tip of a CDC feather. This feather is tied in with the top, or convex side of the feather facing downward, as well as being tied in over the hook eye. This will allow us to make a clean wrap that is held more securely by the wraps we’ll use for the thorax material.

Step 12: Add a small amount of Spawn Simi Seal to your thread. Wrap a compact thorax that will not only act as a hot spot, but will push out the CDC fibers to produce that pupa shape we all recognize.

Step 13: As you bring your feather up to start wrapping the collar, take one wrap of your thread so the thread is now in front of the feather. Make sure all the fibers of CDC are stroked toward the rear of the hook as you begin to wrap the collar. You only need one and a half to two turs of the feather. Once you’ve tied off the feather and wrapped a neat thread collar, add two whip finishes and cover the thread wraps with Loon Hard Head or the cement of your choice. Be careful to avoid getting any cement on the CDC.

Step 14: Once your head cement has dried, dip your fly in some water to see your caddis pupa come to life. Head to your nearest trout water and commence catching.
