FREE SHIPPING ON ORDERS OVER $49 FREE SHIPPING ON ORDERS OVER $49
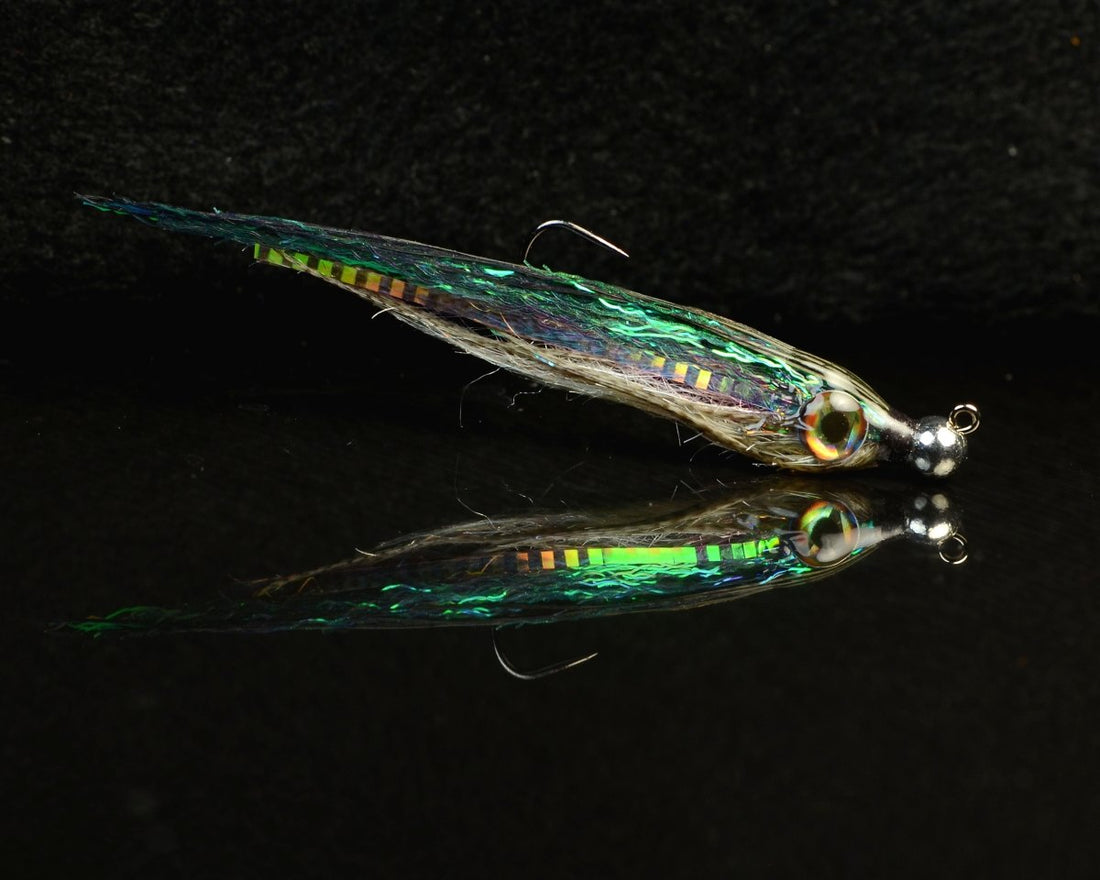
Simi Krink Minnow

Simi Krink Minnow

     If you saw the last SBS with the Simi Seal and mallard you will notice this is just a slight variation to that pattern. It’s always fun to tie a realistic batifish pattern that automatically boosts your confidence on the water. Once you tie and fish a few of these flies I’m sure you’ll make room for more in your fly box. Thanks for tying along.

-Pete  

Materials List:

Hook – Ahrex NS122 size 6

Thread – Iron Gray Uni Thread  6/0

Tail –  Mallard Feathers  Medium Dun

Hook Body – Spawn Siimi Seal UV Seal the Deal

Shank – Spawn Micro Jig Shank 60*

Shank Body – Same as hook body

Body Collar – Mallard Medium Dun

Body Accent- Lateral scale

Dorsal Flash – Snake River Fly  Peacock Krinklezon

Topper – Nature’s Spirit Peacock Stick Herls  Muskrat Gray

Eyes – Spawn Agate 6mm

Resin – Solarez Thick and Thin


Step 1: Place your hook in the vise.


Step 2: Begin your thread on the hook shank and wrap back to where the shank just begins to bend; about halfway between the hook point and barb point. Bring your thread forward to roughly in line with the point to tie in the tail feather. 

Step 3: The feather we want for the tail will have fibers slightly longer than the hook shank. Trim some fibers from the tip of the feather and use that spot as your tie in. The feather should be tied in with its top, or convex side, facing the ceiling.

Step 4: Wrap your feather 5-6 turns making sure to gently coax the fibers rearward with your off hand fingers as your working hand is wrapping the feather. Tie off, remover the excess feather and cover neatly with thread wraps. At this point make a thread loop where the feather was tied off. The loop should be around 5 inches in length.


Step 5:  Remember to add some wax to your thread loop to assist in retaining dubbing fibers. Prepare your Simi Seal fibers so they are stacked thinly in a ladder fashion. Your dubbing stack should be 3 inches. Once you have your stack of Simi ready, carefully transfer it into the thread loop and begin spinning.
Step 6:  Once you’ve spun your loop, brush it gently with a dubbing brush or similar tool. Take a few more securing twists and then wrap the loop up the hook shank using touching wraps. As you wrap, again use the fingers of your off hand to coax back the fibers during every turn. Once you’ve wrapped to the hook eye tie off the loop (which should be mostly thread at this point) and make a neat thread head. Add two whip finishes with 5 wraps per. After your thread is cut, brush out the body and comb back the fibers. At this point cement your thread wraps. If you cement your thread wraps before brushing out the body you run the risk of disrupting the cement.
Step 7:  Slide your bead onto the Spawn Micro Jig Shank before you attach the hook. The 5.5mm takes a bit more finesse, but with some patience it will go on. Once you have the shank loaded in the vise add some non lead .020 lead wire wraps in gap between the shank arm and the bead. Once you have 5-6 turns, slide the wire wraps into the bead cavity to hold it in place. Trim the rear section of wire wraps to coincide with the tying down of the shank arm. After securing down the shank arm and wire wraps with thread, add some cement or glue to the wraps and cover with a couple more passes of thread. Make another 5 inch thread loop at the rear of the micro shank.
Step 8:  Repeat the steps you used to make the hook body. Since the shank diameter is greater the loop will end leaving you a small space behind the bead. Tie down and trim off the dub loop.
Step 9:  The feather for the body collar should have fibers that reach past the trailing hook point. We’ll be removing the fibers from the left side if you look at the convex side with the tip at the top. 
Step 10:  Tie in the feather so the fibers will begin to splay around the body touching the previous tie off. Wrap 3-4 turns of the feather and tie off. Remove the excess feather.
Step 11:  Tie in a small clump of Snake River Flie’s peacock Krinklezon in the space behind the bead. You want the clump to have slightly more length over the hook so that when you veil the Krinklezon it will be ever so slightly shorter, making for a more natural body taper. After you have veiled, or pulled the forward material back over itself, tie down securely with thread wraps. For extra strength you can also add one whip finish at this point.
Step 12:  Tie in a single piece of pink Lateral Scale on each side of the hook shank. For now the length should be the length of the body. The Lateral Scale should ride parallel to and just below the Krinklezon.
Step 13:  Add a decent number of peacock herls to the top of the fly. It may seem like too many at first, but after condensing them with thread and water they will form a slim dorsal line. Trim the excess herl butts and make a neat thread neck. Whip finish twice and trim your thread. Add some cement to the thread wraps.
Step 14: After the cement has dried, dunk your fly in some water to allow all the fibers to lay in place. At this point the fly is more than sufficiently ready to fish, but if you’d like to add more realism, please continue.


Step 15: To finish the head and eyes, simply superglue the eyes in place using the Lateral Scale as your guide. Allow the glue some time to cure. The way I like to finish this style of resin head is to use one layer of Solarez Thick on both the top and bottom of the head, curing with a UV torch in between. At that point I do two thin layers using Thin Solarez over the eyes and sides to blend in with the profile from the Thick resin. Happy Fishing!

Leave a comment